|
This step maintains the details of authorized people, job titles, and attachments. To modify the fields displayed in this screen, apply the following steps:
1. Authorized Details or PRO: editing this section is made possible by adding, editing, or deleting records, as discussed below:
 1. Add Authorized Details 1. Add Authorized Details
Adding an authorized person is made possible through the following steps:
| 1. | Click on Add Icon, to add a new data: |
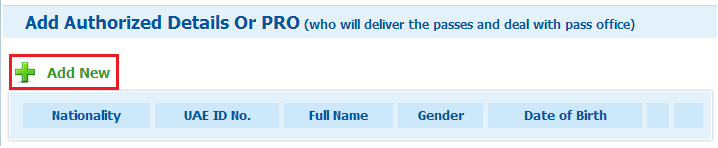
2. Add Authorized Details or PRO page will appear:
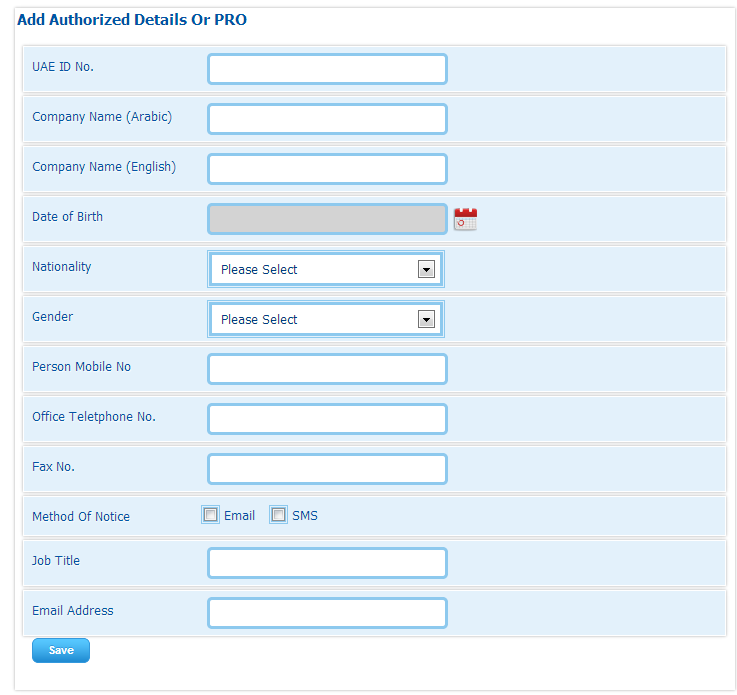
3. Fill in the following fields:
Field
|
Field Type
|
Validations
|
UAE ID No.
|
Mandatory
|
This field is mandatory and the user has to fill it to complete the registration; otherwise this message will appear (This field is required).
|
Company Name (Arabic)
|
Mandatory
|
This field is mandatory and the user has to fill it to complete the registration; otherwise this message will appear (This field is required).
The entered text must be in Arabic, otherwise this message will appear (Please enter name in Arabic).
The entry of the letters (أ , ي or ة) will be automatically replaced with (ا , ى or ه) respectively
|
Company Name (English)
|
Mandatory
|
This field is mandatory and the user has to fill it to complete the registration; otherwise this message will appear (This field is required).
The entered text must be in English, otherwise this message will appear (Please enter name in English).
|
Date of Birth
|
Mandatory
|
This field is mandatory and the user has to fill it to complete the registration; otherwise, this message will appear (This field is required).
Date can be entered either manually or from the Calendar, as discussed in Using the Calendar topic.
Entered date must be less than current date, otherwise the following message will be displayed (Should be less than today's date).
|
Nationality
|
Mandatory
|
This field is mandatory and the user has to fill it to complete the registration; otherwise, this message will appear (This field is required).
|
Gender
|
Mandatory
|
This field is mandatory and the user has to fill it to complete the registration; otherwise, this message will appear (This field is required).
|
Person Mobile No
|
Optional
|
The input of this field, if entered, must be numerical values; otherwise this message will appear (Invalid Numbers).
The entered phone number should follow the format: (code – number), as in the example (00972-501234567)
|
Office Telephone No.
|
Optional
|
The input of this field, if entered, must be numerical values; otherwise this message will appear (Invalid Numbers).
|
Fax No.
|
Optional
|
The input of this field, if entered, must be numerical values; otherwise this message will appear (Invalid Numbers).
|
Method of Notice
|
Optional
|
|
Job Title
|
Mandatory
|
This field is mandatory and the user has to fill it to complete the registration; otherwise, this message will appear (This field is required).
|
Email Address
|
Mandatory
|
This field is mandatory and the user has to fill it to complete the registration; otherwise, this message will appear (This field is required).
Email address entered in this field must follow the valid format; otherwise this message will appear (Email address is invalid).
|
4. Click on Save Button, to save the details:

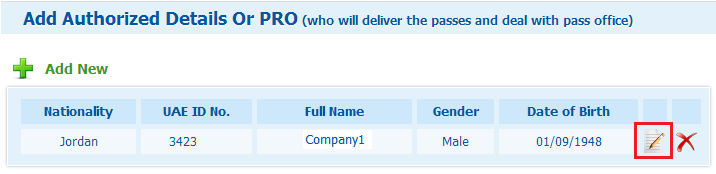
5. If the entered data is saved successfully, then the record will be added to the Authorized Details list and the Edit and Delete icons will be displayed next to it.
|
Editing authorized details is made possible through the following steps:
| 1. | Click on the edit icon next to the intended authorized party details: |
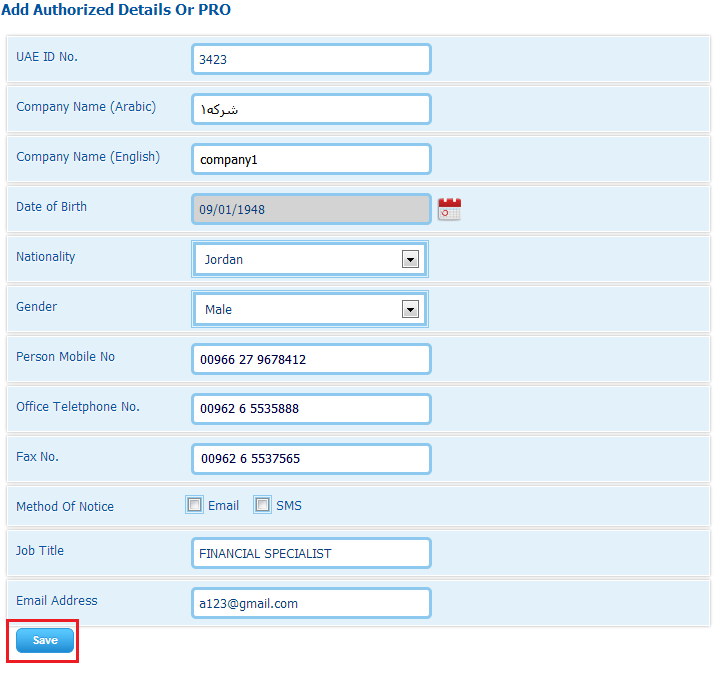
| 2. | The Authorized Details or PRO page will be displayed in the edit mode. Apply the intended changes taking into consideration the validations mentioned in the Add Authorized Details or PRO section, and then click on Save button: |
|
Deleting authorized party details is made possible through the following steps:
| 1. | Click on the delete icon next to the intended authorized party details: |
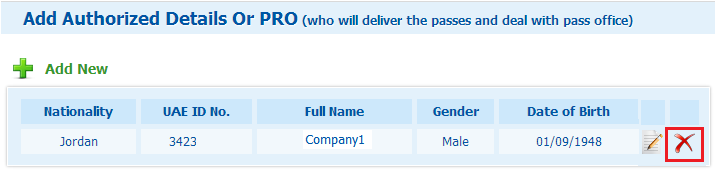
The following alert will be displayed through which you can either confirm the deletion or cancel it:

3) Click on OK to confirm the deletion
|
2. Job Titles: editing this section is made possible by adding, editing, or deleting records, as discussed below:
1. Click on Add New button:

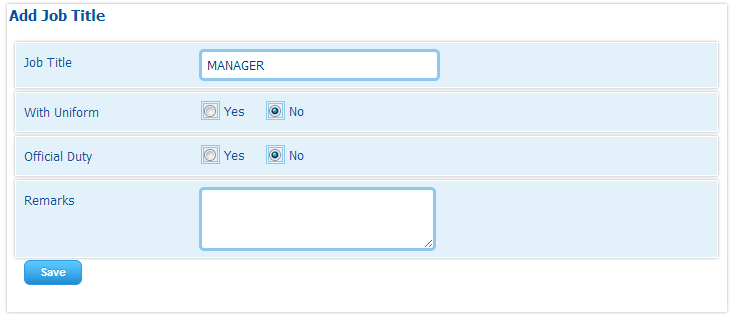
2. Add Job Title screen will display:
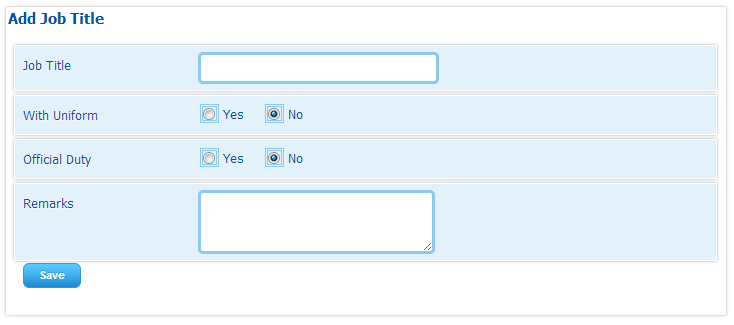
3. Fill in the fields displayed in the screen, as discussed in the following table:
Field
|
Field Type
|
Validations
|
Job Title
|
Mandatory
|
This field is mandatory and the user has to fill it to complete the registration; otherwise this message will appear (This field is required).
|
With Uniform
|
This field is by default set to No. You can change the selection, if required
|
|
Official Duty
|
This field is by default set to No. You can change the selection, if required
|
|
Remarks
|
Optional
|
|
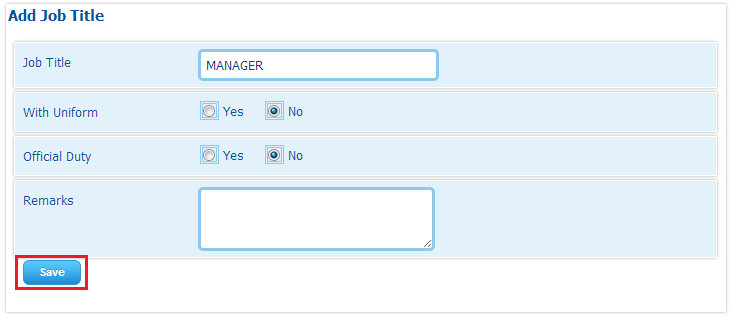
4. Click on Save button:
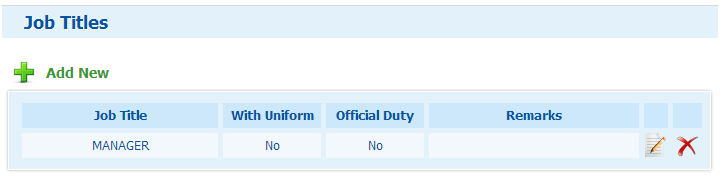
5. If the Job Title is saved successfully, then it will be displayed in the Job Titles section, and the Edit and Delete icons will be displayed next to it:
|
Editing a job title is made possible through the following steps:
| 1. | Click on Edit Icon next to the intended title: |
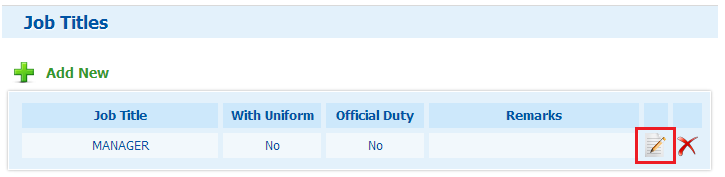
| 2. | Note that the Add Job Title page will be opened in edit mode, where you can modify the job title from the list, and then click on Save button: |
|
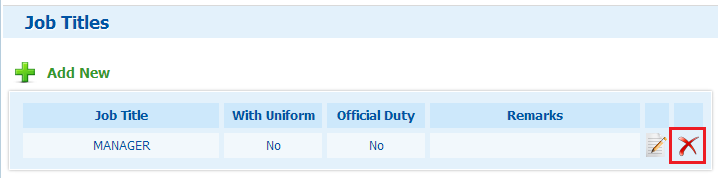
Deleting a job title is made possible through the following steps:
| 1. | Click on Delete Icon next to the intended job title: |
| 2. | The following alert will be displayed through which you can either confirm the deletion or cancel it: |
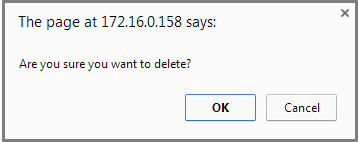
| 3. | Click on OK to confirm the deletion |
|
3. Attachments: through this section, you can upload the attachments related to your company registration. This can be done by applying the following steps:
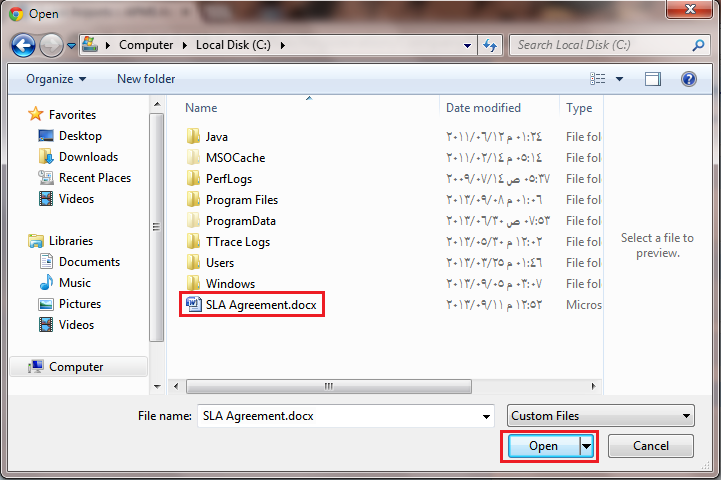
1. Click on the Attachment Icon next to the intended document:

2. Open File dialog box will be opened through which you can locate the intended document and then click on the Open button:
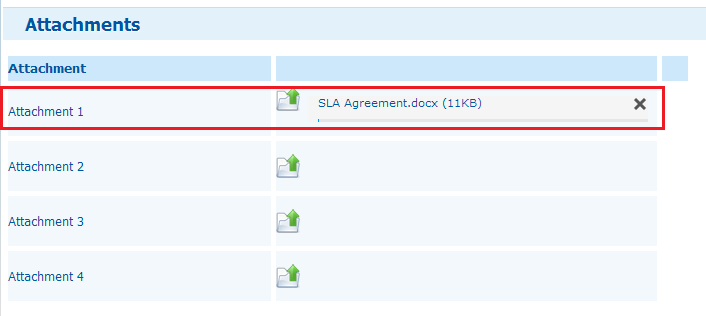
4. Once the file is uploaded, it will be displayed in the Attachments section:
* Important Notes:
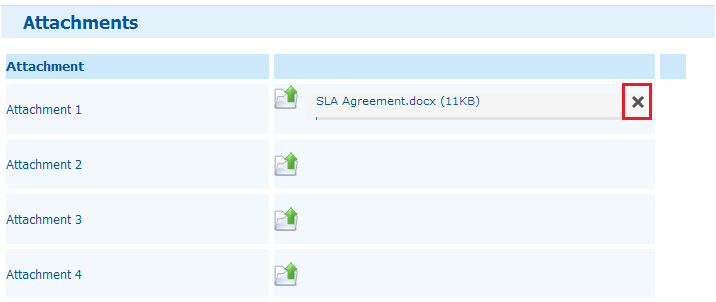
| • | You can remove any uploaded document by clicking on (X) sign next to it, as shown below: |
| • | You cannot upload empty documents |
|
If the sections of this step are filled in successfully, then its tab will change to ( ). ).
|